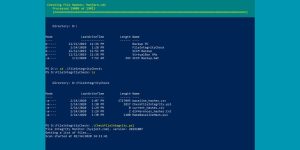
Automation is a powerful tool for managing IT systems, and PowerShell offers robust capabilities to streamline repetitive tasks. Monitoring file changes and automatically restarting applications is one such use case, perfect for scenarios like detecting configuration updates or watching log files. In this guide, we’ll explore how to use PowerShell’s FileSystemWatcher to monitor file changes and restart an application when needed.
Why Monitor File Changes with PowerShell?

File monitoring is critical for system administrators and developers who need to keep track of real-time updates in directories. Whether it’s ensuring logs are updated or watching configuration files, automating responses to file changes saves time and ensures efficiency.
Benefits of File Monitoring with PowerShell
- Automation: Reduces the need for manual checks.
- Timely Application Restarts: Ensures applications reflect file changes immediately.
- Error Detection: Helps identify unexpected changes or issues in real time.
Understanding PowerShell’s FileSystemWatcher

The FileSystemWatcher object in PowerShell leverages .NET functionality to monitor directories and files. It can detect a range of file events such as creation, deletion, and modification.
Key Features of FileSystemWatcher
- Event Triggers: Monitor specific file events, like changes or renaming.
- File Filters: Focus monitoring on specific file types using filters like
*.txtor*.config. - Real-Time Monitoring: Captures file system changes as they happen.
Setting Up File Monitoring with PowerShell
Here’s how to create a script to monitor file changes and respond to them.
Step 1: Define the Directory to Monitor
First, specify the directory and file type you want to monitor. This helps narrow the focus to relevant changes.
Example:
Path: Specifies the folder to monitor.Filter: Monitors specific file types (e.g.,.config).IncludeSubdirectories: Set to$trueto include subfolders.
Step 2: Register a File Change Event
Use Register-ObjectEvent to capture changes in the specified directory.
Example:
This code outputs the name of the file that triggered the change event and prepares the script for further actions.
Restarting an Application When a File Changes
To automate application restarts based on file changes, you can integrate Stop-Process and Start-Process commands within the event action.
Example Script:
Key Commands
Stop-Process: Terminates the application.Start-Process: Launches the application again.
Make sure to replace "ApplicationName" and the file path with the actual application name and its executable path.
Troubleshooting Common Issues
Here are some troubleshooting tips to address common challenges you might face:
FileSystemWatcher Not Detecting Changes
- Ensure the
EnableRaisingEventsproperty is set to$true. - Double-check the directory path and file filter for accuracy.
Application Not Restarting
- Verify the application’s process name using
Get-Process. - Ensure the script has administrative privileges, especially if the application requires elevated permissions.
Best Practices for Monitoring File Changes
Here are some tips to optimize your file monitoring script:
- Set Precise Filters: Use specific filters (e.g.,
*.log,*.json) to avoid unnecessary monitoring. - Log Changes: Create a log file to document changes for audit purposes.
- Test in a Safe Environment: Run scripts in a test directory before deploying them in production.
- Limit Overhead: Avoid monitoring directories with frequent changes to reduce system load.
FAQs About PowerShell File Monitoring
Can I monitor multiple directories at once?
Yes, create separate FileSystemWatcher objects for each directory you want to monitor.
Does this work with network drives?
Yes, as long as the network drive is accessible and permissions are correctly configured.
What happens if the monitored file is deleted?
The Deleted event will trigger. Ensure your script accounts for this possibility.
Conclusion
PowerShell’s FileSystemWatcher provides an efficient way to monitor file changes and automate responses like restarting applications. By combining real-time file monitoring with automated scripts, you can simplify complex workflows and ensure your systems remain responsive to changes.
If you have questions or tips about using PowerShell for file monitoring, share them in the comments below!

